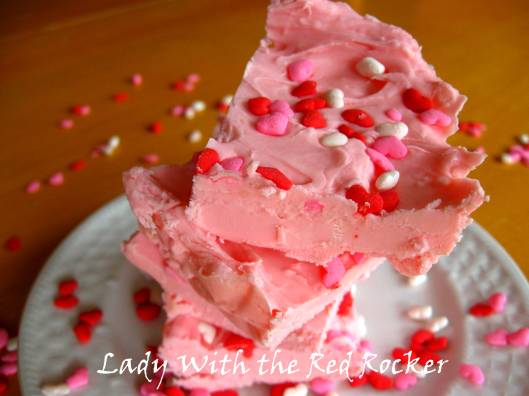
2 Ingredient Strawberry Fudge

Tags

, ,

I’ve never really been that into fudge…

Okay… I’m into “eating” fudge, just not into making it.  It’s always seemed like too much work to me.  I know it’s not hard, I would just rather for someone ELSE to make it for me.  Lazy.. I know!

Well, Peeps! That has all changed since I found this recipe from Cookies and Cups

2 INGREDIENT STRAWBERRY FUDGE (Three, if you count sprinkles!!!)

Say WHAT?!!

It’s true… 2 ingredient fudge! Woo-HOO!!! I’m all over that!
FO-Rilzzz!!

2 INGREDIENT STRAWBERRY FUDGE

1 can of strawberry frosting
1 12 oz bag of white chocolate chips

Line a 9×9 pan with foil and spray lightly with cooking spray.
In the microwave, melt white chocolate chips. (50% power for 30 seconds until melted, stirring in between.)
When chips are melted, evenly stir into the strawberry frosting.
Spread into prepared pan and place in fridge to set for 30 minutes.
Cut into squares to serve. Store in an airtight container for up to a week.

To print this recipe click 2 INGREDIENT Fudge.

Is that not the coolest thing EVA????

Can you imagine the combinations? The possibilities?

So easy! So fast!

Yep, I’m pretty excited… 😀

Have a great weekend, Peeps! 😀

Linked to these parties.

Disclaimer: The adds you see on this blog are not my own. They are from wordpress.com. I have no control over what adds are displayed. I am in the process of moving to my own website, where I can control what adds are displayed. Thanks for stopping by!! 😀

Love Quote on Canvas

Tags

,

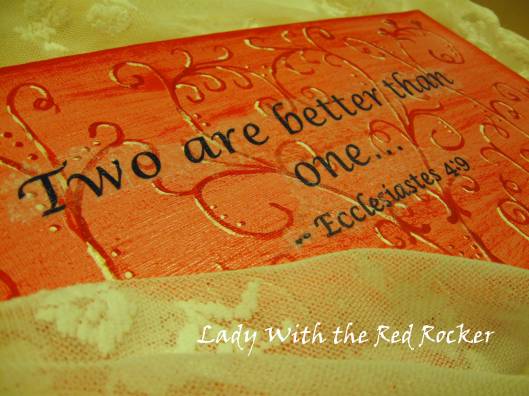
Nothin’ says lovin’ like a little love quote! 😀

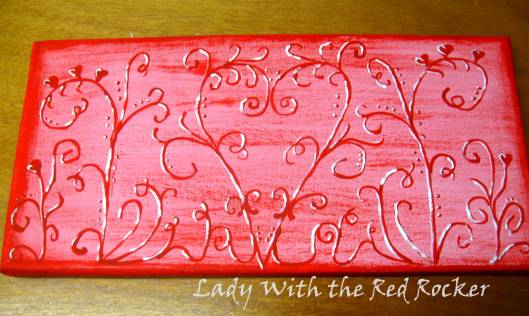
For this lovey-dovey I used stretched canvas, paint, some tissue paper and my printer.

I made this the same way I made the picture and quote for Dad. Except, this time I didn’t have any cool scrapbook paper, so I just painted the canvas with swirly-heartsy curly-Qs.

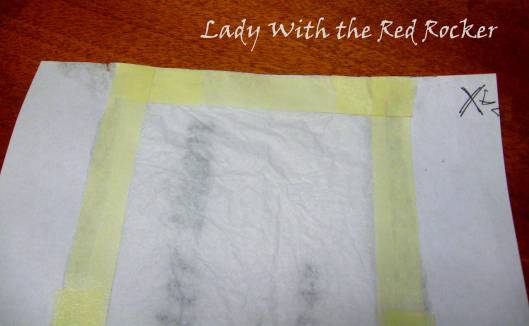
Next, I printed off my quote so I could tell where to tape the tissue paper. Then, I taped the tissue paper over the quote. I also found it helpful to mark an “X” in the corner of the paper so I knew how to place it back in the printer. (Do this before you print off the quote the first time, while the paper is still in the printer.)

After the ink dried, I tore the tissue paper around the quote like this…

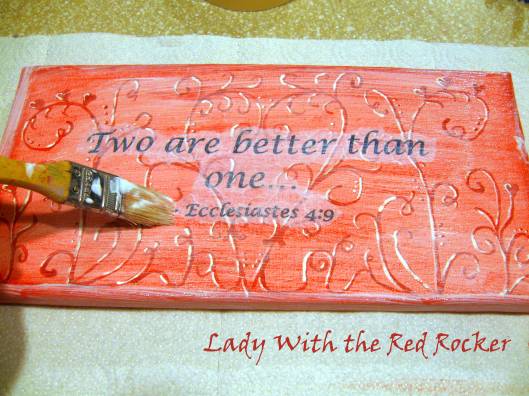
Next, I painted a layer of ModPodge on the canvas and placed the quote over the ModPodge, and then painted another layer of ModPodge over the quote.

The ModPodge made the tissue paper “melt” into the canvas. You can barely see the tissue paper, unless you get right up close and nosey like. 😀

It looks like the quote is printed right on the canvas. Pretty cool, huh?!

Hope you guys have a great rest of the week! 😀

Linked to these parties.

Beyond Goodness Egg Casserole

Tags

, ,

We I love breakfast for supper, in fact we I would have it every night for supper if we I could. 😀 I found this recipe for Egg Casserole from My Judy the Foodie, and I thought it sounded good, so I wanted to give it a try.

I wanted to make sure this recipe fed all of us for supper, and then maybe have enough left over for breakfast, so I add more eggs, and I didn’t have any bacon, so I used some ham. (Black Forest ham to be exact.) I also added some dried onions.

Let me tell you, I have made egg casseroles before, and they were good, but this egg casserole blew those others OUT OF THE PARK! I’m for-serious! The combination of the croutons, Black Forest ham and the onions are what took this egg casserole from good to beyond goodness!!!

Beyond Goodness Egg Casserole 

1 bag cheese croutons
2 cup shredded cheddar cheese
6 eggs
2 cups milk
1/2 teaspoon salt
3/4 teaspoon dry mustard
1 Tablespoon dry minced onions
½ lb Black Forest sliced deli ham (or any type of sandwich meat)
Pepper to taste

Preheat oven to 325 degrees.
Layer cheese croutons in the bottom of a greased 13×9 casserole dish.
Sprinkle 1 cup of shredded cheese on top croutons.
Slice ham into small pieces and sprinkle on top of cheese
Mix together eggs, milk, salt, mustard, pepper and onions in a bowl.
Pour mixture over top croutons, shredded cheese and ham.
Sprinkle remaining cheese on top.
Bake uncovered in oven for approximately 1 hour.

To print this recipe click Beyond Goodness Egg Casserole.

Just look at all that cheesy, eggy goodness! YUMMM!

This would be a great breakfast-in-bed for your sweetie OR, DINNER… whichever! 😀

Linked to these parties.

Handcrafted Pendants

Tags

, ,

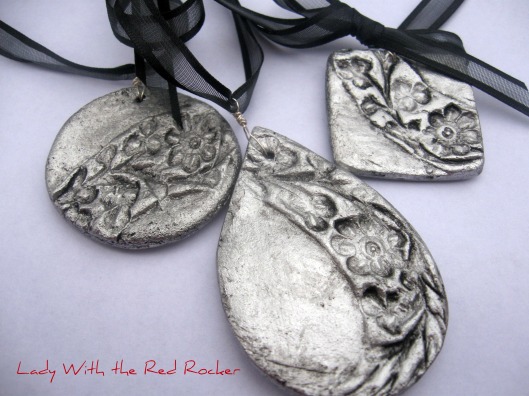
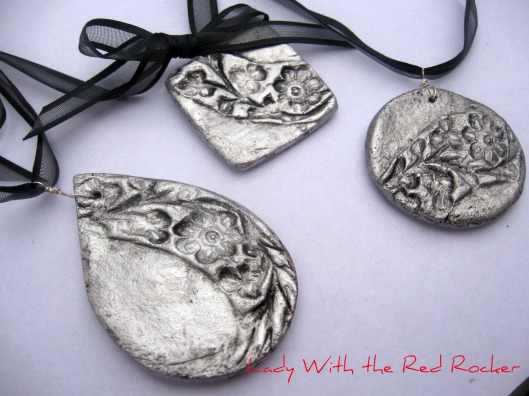
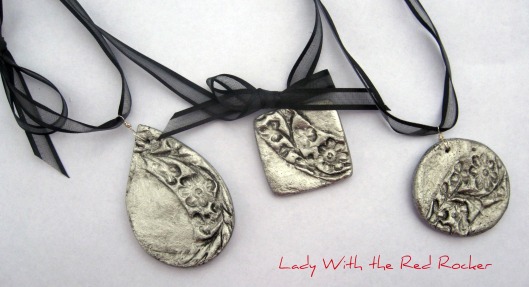
Would you believe what these are made of??? Well, of course you would, ’cause your smart!!! 😉

Salt Dough! Who knew, right???

I know, I’m a nerd, but I like playing with salt dough. There, I said it…

But seriously, would you believe that this is salt dough??? I really love how they turned out…

I made it the same way I made the heart necklace, except this time I used Krylon Brilliant Silver spray paint, instead of fingernail polish.

I cut some of these out by hand, but some of them I cut out using… ummm… These…

What?! I washed them before I gave them back to my daughter. 😉

I also used this fancy stamper to get the images embossed onto the dough…

Yes, it’s a wooden tray… I know… I’m cool that way. 😀 I thought the carvings were pretty, so I used it.

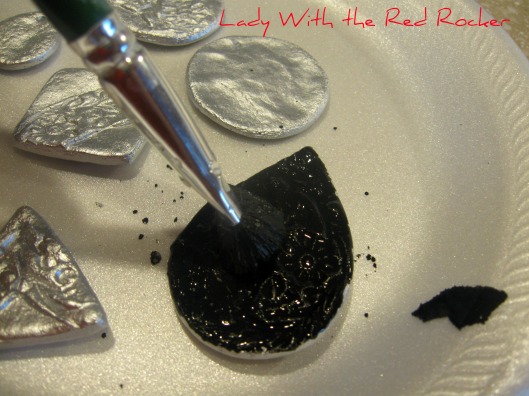
To get an antiqued look I stippled watered-down black paint onto the pendants and wiped the paint off with a wet paper towel.

If you notice the round one is a little darker than the other two pendants, it’s because I used a dry paper towel to rub off the paint. I liked the lighter look of the other two, so I went with a wet paper towel for those.

So easy, and so cheap to make! Love it!

Have a lovely week, every-peeps! 😀

Linked to these parties.

Cracker Toffee

Tags

, ,

Are you making anything sweet for your “sweetie” this Valentine’s Day? Here’s a treat that is sure to please. (That sounded like a commercial!)

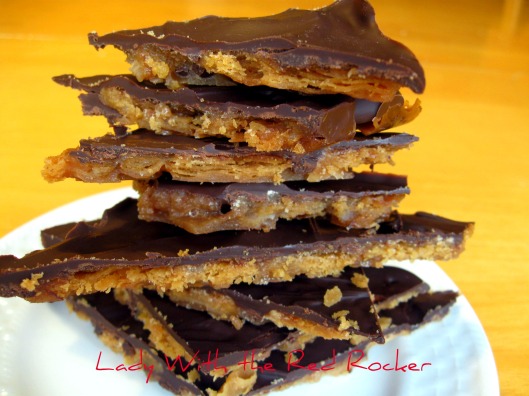
Cracker Toffee! I know, it sounds weird, but it’s OHHH sooo good!!!

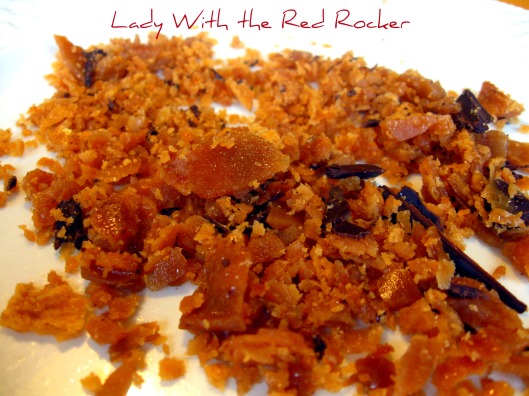
My husband, who is not a huge candy person, devoured them! (I need to figure out how to make these sugar-free and FAT free…) After the big pieces were gone, the kids where still begging for the left over crumbs.

I adapted this recipe from Make Life Delicious. She used saltines, but I used buttery crackers (Town House), and they turned out de-lish!!!

Cracker Toffee

40 crackers (saltines or buttery crackers, like Town House)
1 cup butter
1 cup dark brown sugar
2 cups semisweet chocolate chips
3/4 cup chopped pecans/walnuts, if desired

Preheat oven to 400 degrees. Line cookie sheet with foil and spray with non-stick cooking spray. Line cookie sheet with crackers in single layer.

In a saucepan combine the sugar and the butter. Bring to a boil and boil for 3 minutes. Immediately pour over saltines and spread t cover crackers completely.

Bake at 400 degrees for 4-5 minutes, or until toffee is bubbly. Remove from oven and sprinkle chocolate chips over the top. Let sit for 5 minutes. Spread melted chocolate and top with chopped nuts, if desired. Cool completely and break into pieces.

To print this recipe click Cracker Toffee.

These taste like crackers on steroids, or crack, or somethin’. In fact you can’t even tell there are crackers in it! All you can taste is the buttery, crunchy toffee.

I’m pretty sure that these toffee bits are going to meet their fate on top of some ice cream… Fo’ Sho…

Absolute bliss… MMMMM…

Go make up a batch of these delights, your sweetie will love you! I know mine did! 😀

Enjoy!

Salt Dough Heart Necklace

Tags

, ,

I think that salt dough has come a long way from what I remember as a child, and I’m totally addicted to making stuff with it!!!!

I really love seeing all the cute ideas on Pinterest. I like the ones that look like pewter, or metal. So cool!

I painted these hearts with nail polish. I thought it made them look like candy. Good enough to eat… except don’t… ’cause it will taste like SALT! (Just ask my son… Yep, he ate some dough.)

Salt Dough Recipe 

2 parts flour
1 part salt
Some water (add enough water until dough forms and it feels like pizza dough, or bread dough, or play-doh, or whatever you’re used to… ;))

Mix thoroughly, until dough forms. Roll out and form as desired. Bake at 250° for 2 hours. Cool and paint.

To print this recipe click Salt Dough Recipe.

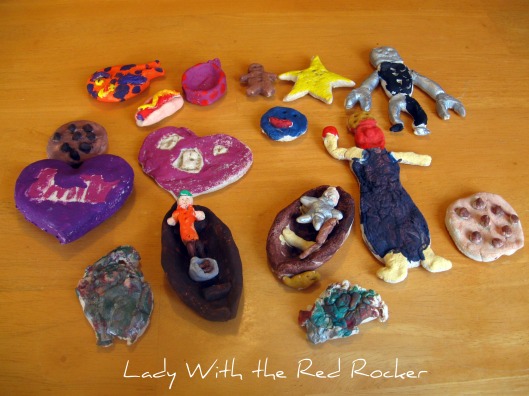
How easy is that?? My first batch I did 2 cups flour and 1 cup salt.  Um… it made A LOT of dough!!!!  My kids had a hay-day making all kinds of stuff.  It kept them busy while I was gettin’ crafty. 😀

Here is some of the stuff they made…

I rolled out the dough, and cut out my little hearts by hand. (That sounds so evil, doesn’t it?? :D) Then, I smoothed, and continued to form the hearts until I liked how they looked. After that, I poked a hole in them so I could make my necklace.

This slideshow requires JavaScript.

I used flat white spray paint with primer to give the hearts a base coat, and then I gathered up some fun nail polish. (Mostly from my daughter’s room… Shhh… ;)) I used several coats of nail polish to give the hearts a nice hard finish, and then added a clear top coat. (Letting all the layers dry in between, of course.) I also let the polish dry over night, to make sure the hearts were nice and dry. (That reminds me… Don’t you hate it when you do your nails right before you go to bed, and then wake up with sheet prints? Sheet prints are the worst!!! :D)

I think they turned out kind of cute. (Even if some of them do look like fish when you turn them on their side… :D)

Linked to these parties.

Pumpkin Baked Oatmeal

Tags

, , ,

It’s always hard to know what to do with left over pumpkin after the holidays… Last night the kids wanted me to make Baked Oatmeal, and I thought a little pumpkin thrown in would taste yummy, and help me use up my pumpkin.

It turned out fabulous!!!

Pumpkin Baked Oatmeal

6 cups quick oats
1½ sticks of butter (melted)
1 cup brown sugar (You can adjust the amount of sugar to your liking. You can also use part sugar and part honey if you like.)
1 cup canned pumpkin
¾ tsp. salt
3 eggs
2 cups milk
3 tsp. baking powder
2 tsp cinnamon
1 tsp pumpkin pie spice
½ pecans, chopped (optional, but oohhh so good! :D)

Combine all ingredients together in a bowl, mix well, and pour into a 9×13 baking dish.  Cover with foil and refrigerate overnight.  In the morning bake at 350° for 20 minutes with foil off. (I mentioned before, I write the temp and the time on the foil, so my hubby knows how long to cook it in the morning. ;))

To print this recipe click Pumpkin Baked Oatmeal.

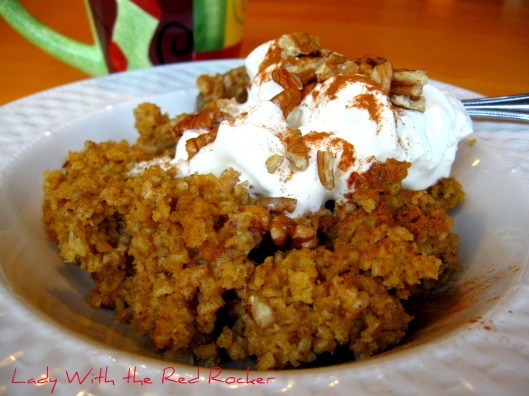
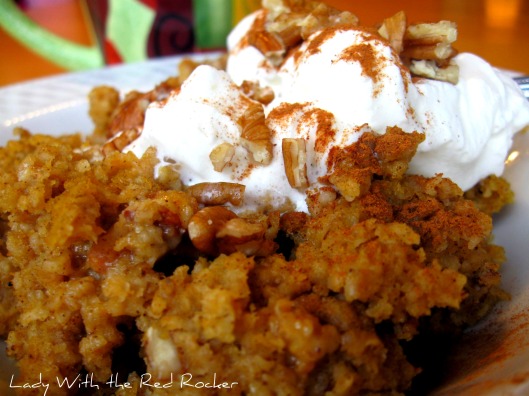
This was really yummy, and really filling, with just the right amount of pumpkin. Just look at all that pumpkin and nutty goodness…

A little dollop of whipped cream makes it even better! Just perfect for a *cold* winter’s morning… okay, it’s not been “cold”, per-say… It’s just right for a ‘coolish’ winter’s morning! How’s that?? 😀

PS. I got my inspiration from Bowl of Cherrys. She had a microwave version you should check out if you are in a hurry! 😉

Enjoy!

Linked to these parties.

DIY Clorox Clean-up

Tags

,

I. LOVE. PINTEREST!!!!!! If you have not gone over to the “other side” you do not know what you are missing!!!  For serious! It is a gold mine of crafting ideas and recipes, and the like. If you don’t know what Pinterest is… (what? are you living under a rock?? JK! JK!!! :D) it is a website that lets you “pin” fun websites that you come across, to your virtual pin board. You can pin anything you like… recipes, quotes, articles, crafts, or anything that you want to bookmark to remember for later.

Re- Purpose Jeans DIY

(picture source)

Spring Bouquets

(picture source)

If you have a specific interest in something, let’s say, “crafts”, you can go to the “everything-DIY/crafts” page and it will show you everything that other crafters are pinning on their pin boards, AND… you can re-pin their pins. How cool is that???

I will caution you to beware of the “everything-everything” page, it has… well… everything that everyone is pinning and it is not categorized, so you might come across some that you are not prepared to see…

Pinned Image

(picture source)

Pinned Image

(picture source)

Pinned Image

Oh, wait… That last one was mine! 😀 Yummy Oreo Pops!!! (Seriously though, the “everything” page has everything, so I just stick to the categories, it’s safer that way! ;))

You can also “follow” people if you like their style of crafts, or fashion, or recipes, or whatever… *ahemm* Or, just because you like that person. *wink*wink* For an example, you can follow me, if you like, here. 😉

So, anyhoo… I found the coolest thing on Pinterest the other day.

DIY Clorox Clean-Up!!!

Well, I thought it was the coolest thing, any way. 🙂 I have a house with 2 boys (3 if you count hubby), and one of them is still trying to figure out how to get it in the bowl, without getting it on the walls… the floor… and shower curtain before he hits the mark. (He’s 3…) I use A LOT of Clorox Clean-up!!! When I saw this pin for DIY Clorox Clean-Up from Fake-It Frugal, I was a little bit excited. 😀

DIY Clorox Clean-up

1 Empty Bottle of Clorox Cleanup or an empty (1 quart size) Plastic Spray Bottle
¼ Cup Bleach
1 Teaspoon Laundry Detergent
Fill the rest of the bottle with Water and Shake!

Can you say, “super easy”??? I don’t know why I haven’t thought of doing this before!!! It’s so much cheaper.  Waaaaaaaaaaaaay cheaper!
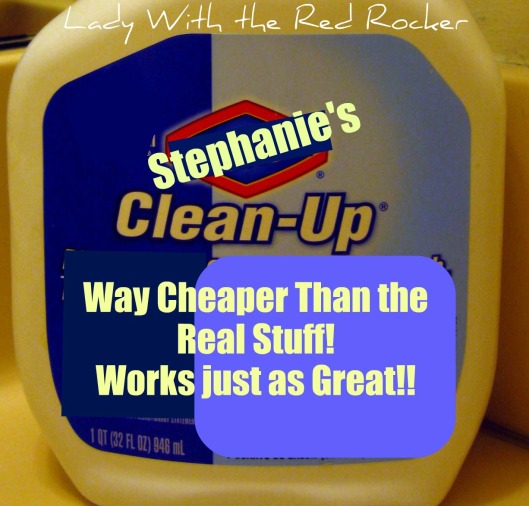
I love this stuff. I actually like the smell of the DIY stuff better than the real stuff. The DIY stuff smells cleaner and fresher to me. (Did I say “stuff” enough for you?)

Heather at Fake-It Frugal did a cost analysis and the savings is amazing!

Bleach is really cheap, around $1 per gallon. You can make 64 bottles of DIY Clorox Clean-Up, from 1 gallon of bleach. That comes to about $0.02 per bottle.

Real Clorox Clean-Up is about $4.99 a bottle. That’s a savings of $4.97 per bottle! Wowzers!!! I don’t know how companies can sleep at night, knowing they mark their stuff up like that!!!

I did read some comments at Fake-It Frugal that I should mention. A couple of ladies said that they worked at daycare, and they used bleach water to sanitize toilets and diaper areas. The Health Department required them to replace the bleach water everyday, because bleach will lose it’s effectiveness over time.

My thought is… either increase the amount of bleach you use (maybe use ½ cup instead?), or just make a half batch and only make it when you need it.  I mean, I realize times are tough, but I think that at $0.02 a bottle, I can afford to throw out half a bottle. Right???

What do you smarties think??? If you increase the bleach to ½ cup do you think it would lose its effectiveness?  Do you think ½ cup is too strong?

I don’t know about you, but even if I have to make a new batch every time I clean… Totally worth it!!!  Don’t you think??? 😀

Linked to these parties.

When Ladybugs Attack!!!!

Tags

,

I’m not sure if it has to do with living on the edge of town, in a community that used to be farm land (like, over 20 years ago!), or what, but we have problems with ladybugs.

Don’t get me wrong… Ladybugs are cute, right???

When we first moved here, I kind of liked the ladybugs, I mean, I thought they were cute.  Who couldn’t love a ladybug?

All red and cuddly…

Well, now we are past the “cute” stage, and are smack dab in the middle of the annoying stage.

Um… Maybe, more like horror-movie stage. (Have you seen The Birds anyone?)

(Picture Source)

In fact, I’m starting to lose sleep over these stupid things! (And, I hesitate to call any of God’s creation, “stupid”.) They attack me while I’m least expecting it, when I’m off in dreamland (turned nightmare)!  They go right for my face while I sleep, in the dark of the night.  When they land on me, I’m not thinking…

I’m thinking, more like…

giant isopod

(Picture source)

AAAAAHHHHHHAAAAA!

Then, I break out into my ninja-warrior routine.  I’m sure it is funny to watch, (and I don’t know how my husband sleeps through all my karate chopping!) but, I will not be eaten alive! Not while I sleep!!!!!

I’m to the point where I lie in bed just waiting for one to land on me. And, every little hair or blanket that touches my face… Whack! I’m smacking myself silly!

Have I mentioned that ladybugs don’t smell very nice? They have a little defense mechanism when you smack them on your face, they smear this disgusting odor all over the place. Not very conducive for sleeping, trust me!

AAARRRRGGGGHHH!

Why are they attacking only me?? No one else in my family seems to be affected by the Ladybugs. My husband says I need to get a C-Pap mask, and I won’t have to worry about it. Yeah, right, I say! Those Ladybugs are smart. They would figure out a way to get into the machine and I would inhale them, and they would eat me from the inside out… 😉

Does anyone else have ladybug problems, and how do you battle them? Nija style? 😀

Linked to these parties.

DIY Dishwasher Soap Packets

Tags

, ,

Happy 2012, all!!!!

Wow!What a break! I think I need a break from my break.  We were busy, busy, busy all two weeks, and I can’t even remember what we did to stay so busy. I had grand plans to get lots done, but… well, you know how it goes…

I did get one thing accomplished. I perfected the pre-measured dishwasher soap packets, that I utterly failed at the first time I tried to make them.  Believe me… I… F.A.I.L.E.D.!!!! But, I won’t bore you with all the gory detail.

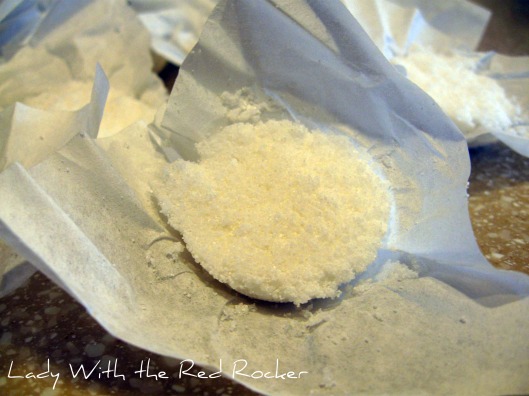
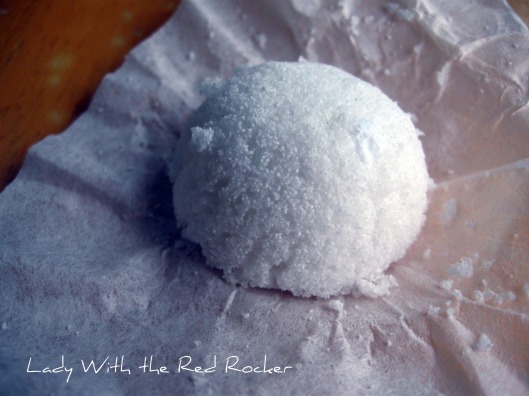
Here they are! Dishwasher Soap Packets! (or, as I like to call them, soap biscuits. ;))

Aren’t they pretty??? 😀

These are really easy to make. The trick is to not get the dishwasher detergent too wet when you are making them. (Which is why my first batch FAILED! ;))

Here’s what you do…

Start with your DIY dishwasher detergent, and put it in a large bowl. Begin spritzing it with water and stirring the water into the detergent. Not too much water, just a little at a time. (If you get the detergent too wet it will go all volcano on you. Trust me… NOT COOL.)  Get the detergent just wet enough that when you squeeze it in your hand it starts to stick together, like damp sand.

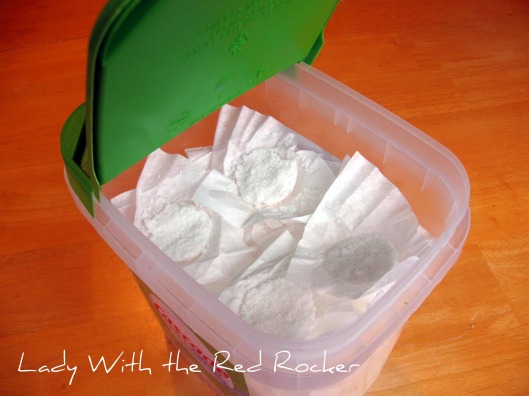
Then start scooping out 1 Tablespoon mounds. I packed mine into a mini muffin pan lined with coffee filters that I had cut into fourths.  I could only fit 20 in the pan (the detergent recipe I use makes about 40 or so), so then, I lined my measuring spoon with a piece of the coffee filter and packed the detergent in to form pre-portioned little mounds in their own little wrappers. Like so…

Let them air dry for about an hour or so, and store them in something with a lid. I just used my old store bought dishwasher-detergent container, and it works well.


<

I just need to come up with a cute label to cover up the old one. ;p

Now, I don’t have to worry about my kids using too mush soap when they load the dishwasher. (Whenever they do, that is!) Love that!!!

One more thing… be sure to test out if your little “soap biscuits” will fit into your soap dispenser in your dishwasher. You may have to slightly flatten them if they are too tall for the dispenser to close. Just FYI. 😀

Hope everyone has a wonderful 2012! (and a good rest of the week! :D)

Linked to these parties.